Is there an iconic place in your state or region where you have never been? Just outside of Melbourne is the famous Hanging Rock, so integral to Joan Lindsay’s book Picnic at Hanging Rock, which was made into the beloved Australian film directed by Peter Weir in the 1970s. I have never been to Hanging Rock and really regret this. The story is soon to be released as a Television series. Here is a video showing the rock with the fateful ascent by the schoolgirls, Miranda and her friends, before they disappear on Valentine’s Day, 1900, which is set to the original music.
Hanging Rock is definitely one place I want to visit. It has been the setting for outdoor concerts and picnic race meets at the nearby racecourse. I wonder if you don’t get around to seeing local sights because they are easy to get to and you know (and hope) that they will always be there, while distant places draw you away. It has often taken me ages to get around to seeing renowned locations in my state, such as the Grampian Ranges.
While Joan Lindsay’s story is not fact it has become a part of Australian folklore. Hanging rock seems a mysterious place because of that story and has become a little bit intimidating. Not to mention the snakes that would lurk amongst the rocks in summer. Judging by the following video Hanging Rock is a maze and it is not hard to believe that it would be easy to become lost or trapped within the monoliths.
There is a flash dance mob of massed “Mirandas” planned for the rock on February 25, which will be filmed for You Tube (click info link here). Again the place will be swarming with young ladies in white turn of the 20th century dresses. This might become an annual event like the Kate Bush Wuthering Heights red dress dance that happens all over the world. With that rock it will be very dramatic and the new TV series is sure to bring more fans to the story and the site.
I guess I’d better go and see Hanging Rock before it is overrun by wafting, wannabe Mirandas. Autumn would be a good time to visit when there are fewer snakes. And if you do see a ghostly Miranda coming towards you from amongst the rocks my advice would be to run.
Every country has its iconic locations that are often associated with a work of fiction or local legend. This is a very good reason for visiting such places and maybe having a picnic. Just be careful if you wander off amongst big rocks or other mysterious features.
On another tack, Ellie and I made some more paper last weekend using shredded magazines mixed with a paler pulp. Here are mine.
We will try new combinations of paper and cotton to create decorative effects until we have a good stash. I don’t fancy doing this in the winter as you make a lot of mess and need to be outside so we’ll make the most of the nice summer weather.
When you are doing something creative have you noticed sometimes there is a point where everything can suddenly go wrong if you don’t immediately adjust to the situation? I guess this is also echoed in our way of life. In many areas we have reached the tipping point for our planet. This is a good reason for artists to use recycled materials.
I read on a local news site yesterday that China is no longer accepting waste materials from Australia for recycling (link to article). This means all the plastic and paper that was to be sold to China will go into landfill if it cannot be recycled here. Councils are now asking ratepayers to cut down on the amount of waste for their recycling bins. This is the result of sending our problems overseas and not finding a creative solution for recycling large quantities of paper and plastic in our own country. If we are to prevent turning our environment into a tip and being swallowed by mountains of rubbish, it will take a change of mindset for our society, which won’t be easy. At the very least, as artists, we can recycle materials in our work.
Many local artists and designers have already been using recycled items to create works of art and are trying to make a difference no matter how small. It is also good for the soul to turn rubbish and junk into something beautiful, as well as unique. Here is a link to an exhibition Turning Trash to Treasure held at the South Melbourne Market in September 2017.
Reusing old materials is a source of inspiration and often requires a lot of rethinking when you run into difficulties. Ellie and I have been learning to make paper from old cotton rags and clothing for use in artwork. We have been having problems with making a very fine pulp, as mentioned in recent posts. This requires breaking down the cut-up rags in the washing machine and repeated processing in the blender.
It is quite time-consuming so we decided to mix this with a pulp made from shredded computer documents and other paper of a reasonable quality. We found out that if you add calcium carbonate powder, also known as whiting or chalk, this will make an acid free pulp (here are the instructions: How to make Acid Free Paper). We bought some from our local art supply shop as it is used in printmaking. We have also decided to size the paper with a clear artist’s gesso after drying rather than adding starch to the pulp.
Papermaking is a really good way to use up old paper rather than putting this in the recycling bin. Last weekend we started making paper with paper pulp on its own to get a feel for the process. This was totally different from the cotton pulp. The first day that we tried this the pulp was a bit lumpy and so some of the sheets were a little thick. When dried this it looked like the recycled molded cardboard used to separate wine bottles in the carton, which was not what we were going for.
We had also obtained a smaller A5 mold and deckle to make cards, which was easy to use and required less pulp. As the lumps disappeared from the pulp mix the paper became thinner and smoother.
When we began doing this outside under some sun umbrellas it was quite warm. Just as we were starting to get the hang of the process the sky darkened and there was the sound of distant thunder. With the storm getting closer it was quite hard to concentrate. Not wanting to be stuck outside with lightning imminent we hurriedly packed up and put the paper in the press under the car port then dried it flat inside. After drying the paper was pressed under a pile of heavy books because it had curled a bit.
The next day it was even hotter and we decided to continue the process under the car port just in case the weather changed. The pulp had softened even more and was a better texture. Because it was thinner we had to be careful when getting it off the deckle. The cleaning cloths that we use for separating the paper sheets need to be really wet or the paper won’t come off the deckle. The hot weather didn’t help and we had a lot of disasters before getting this right. If you sponge the back of this once it is upside down on the cloth the paper comes off more easily.
We noticed that there was a variation in thickness of the paper but it was better than the day before. If the pulp mixture became too thin the paper was more likely to fall apart when transferring it to the cloth so it was necessary to add more pulp when this was starting to happen. You had to watch out for this tipping point to avoid failure.
When we had finished we pressed the sheets between our plywood boards with bricks on top and dried them by pegging the backing cloths on a drying rack. This worked better than trying to dry them flat on a surface. Some sheets are better than others but we can experiment with the sizing on some or use them for collage so nothing is wasted and we can always re-pulp sheets that are too horrible.
Next we are going to try some shredded magazines together with recycled computer paper to see if we can make some interesting decorative paper. After we have reprocessed some of the colored fabric we can include a small quantity of this fibre in the mix.
Individually we might only be using a relatively small amount of recycled material but it’s better than doing nothing. It’s a pity that more local manufacturers are not doing their own recycling of plastics and paper for their products. So much has been done overseas and now that this is no longer sustainable we will all have to be aware of the amount we consume and how to cut this down. This will not be easy so the more people who can come up with creative ways to reuse recyclables, as in artwork, hopefully we can avoid the tipping point.
Kat
There are quite a lot of songs with “Paper” in the title. I love this one from the sixties, Paper Tiger, performed by Sue Thompson. It’s a live version but she is miming and obviously enjoying herself.
After having a several close encounters with some of Australia’s native creatures in our garden over recent days, it has made me realize just how important such oases are for the preservation of wildlife. Another house and established garden is about to be demolished in our street and a habitat for native birds and animals will disappear. Our place is fast becoming an island of greenery and haven for small creatures.
A week ago on a morning with a forecast of 42°C (107.6°F) I noticed a little Marbled Gecko had hidden inside one of our garden umbrellas. He had to be moved or he would not have survived the expected heat so I carefully maneuvered the umbrella so that he climbed into the foliage of our fernery where he could hide in a cool, moist place. Stupidly I did not take a photo of him so here is a video of one in the bush. These geckos are native to South Eastern Australia.
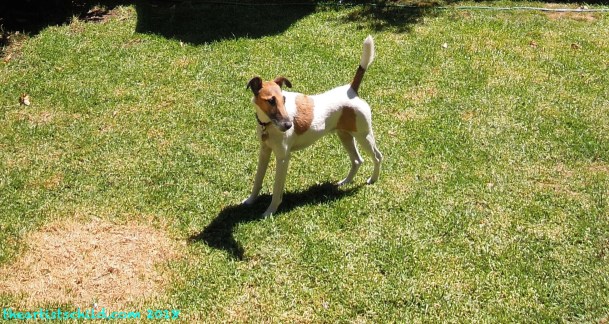
The only other reptile residents of our garden are tiny Garden Skinks. These small lizards hide between rocks or in woodpiles. If the dogs see the little lizards they go crazy trying to catch them. They are harmless and quite shy so you are lucky to glimpse them at all. The following video shows one found in a You Tuber’s back yard.
Our two citrus trees attract the largest butterfly found in Victoria, the Orchard Swallow Tail. All summer I have been seeing these flitting around our garden. As many butterflies are becoming less common, gardens without trees will not do their numbers any good. Just to show how beautiful these butterflies are here is another video that feature the both the dark male and lighter female.
A few nights ago we were putting out the rubbish and there was a large Garden Orb Weaver Spider making a web attached to large shrubs across the driveway. I rushed to get my camera to photograph the process. Ellie focused a torch (flashlight) on the spider but even then the shutter speed was very slow and as the Orb was moving really fast, the photos were quite blurry, but you can get the gist. These webs when completed are quite large and the spider will sit in the middle waiting for its prey. Ellie said she had seen this spider for a few nights in this spot. Unfortunately we had to detach one side of the web to put out the bins, but I’m sure the spider rebuilt it after we had left. They are very persistent creatures.
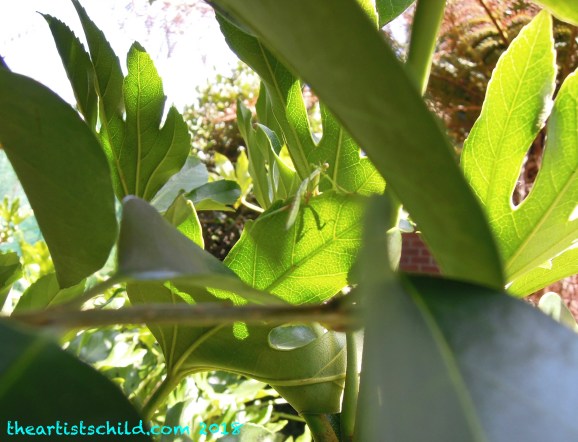
This morning I came inside from the garden and felt a tickle on my arm and there was a green Preying Mantis. I love these insects and they do a lot of good in the garden. I flicked him off, but rather than having him eaten by the dogs, quickly got him onto a piece of paper, took him outside and deposited him on a leaf. I managed to take some photos but he was moving quite quickly so they were slightly out of focus. I wish I had a good DSLR camera to be able to take good close-ups of small creatures but this is the best I could do.
Our garden always has resident native birds. The Little Wattlebirds are constantly chattering and singing as they fly around or look for nectar in flowers. Their song ranges from squawks to beautiful chortles. In spring I often see them feeding their young. They are quite aggressive birds and will chase off food competitors, especially parrots like Rainbow Lorikeets, making a lot of noise in the process. Here is one enjoying some Banksia nectar in someone’s garden.
The only birds that the Wattlebirds don’t mess with are the native Little Ravens, a misnomer because they are quite large birds. Unlike Ravens in the Northern Hemisphere, which have black eyes, all Australian Raven and Crow species have white eyes. They are very handsome birds and a group of them visit our garden often in the spring making themselves at home in the large tree next door. Because they move so quickly and perch high up in the trees, I have never been able to photograph them successfully but I found a great video of a Little Raven taking a bath in country South Australia.
Where will city’s the native birds, animals, reptiles and insects live when their garden habitat is destroyed? So many people are building houses that take up most of the block and replacing established gardens with the minimalist designs favored by local developers. These don’t allow for the native wild life’s need for places to hide from predators, the hot summer sun and the winter cold, as well as abundant food sources.
It’s unfortunate that many homeowners value lifestyle over wild life. At the rate Melbourne’s established gardens are disappearing, future generations won’t have all these beautiful native creatures on their doorsteps for their children to learn about nature and will have to travel miles for such an experience.
If you do have a garden make the most of it and it’s wild inhabitants while you can and never take it for granted.
When you teach yourself something new it does not always go to plan. While you might be trained in a related field this does not mean that you will be able to do a new technique well at the beginning. Often you learn things by trial and error. There are bound to be technical difficulties from a lack of knowledge and not having the best equipment for the job, so you spend a lot of time trying to overcome these issues as best you can. It can be a big learning curve.
As I have said in the last two posts, Ellie and I are teaching our selves how to make rag paper. This all sounded very straightforward in “how to do” articles on the net. So we jumped in, bought the basic equipment, prepared the materials and started to make paper outside under the car port. That’s when we discovered this was not as easy as it looked.
Mold and deckle
Paper making equipment
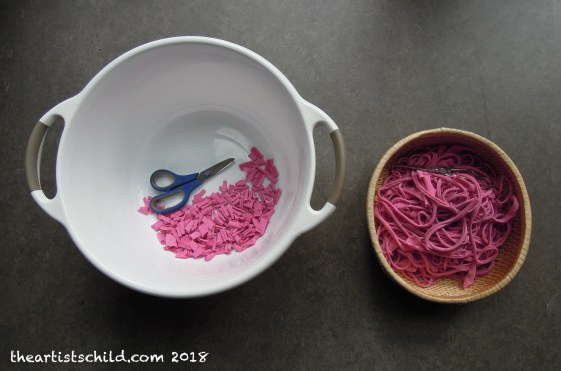
Pulp in tub
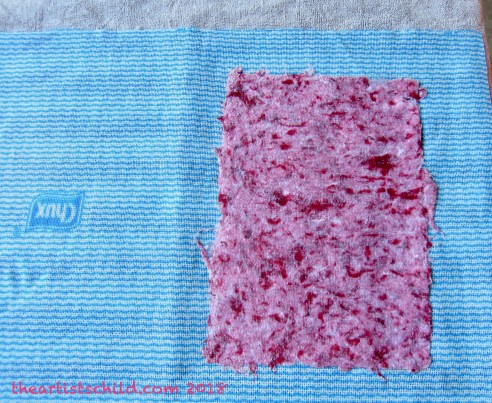
Pulp with more red added
First sheet out of mould
Paper press made from four sheets of marine ply, old towels and bricks
Bricks act as weights on press
Firstly we had not made enough pulp to completely fill the tub to make a lot of sheets. The pulp in two colours that we had made in the blender was too coarse and the process was closer to felting wool than paper making, which I have done before. You could plug up any holes in sheets with bits of pulp before taking them off the mold just like you can when making felt. We did not panic when things went wrong but had a good laugh about our shortcomings. The results were quite decorative and can be used in collage but they are not suitable for writing or drawing upon. We had to go back to the drawing board and work out how to make finer paper.
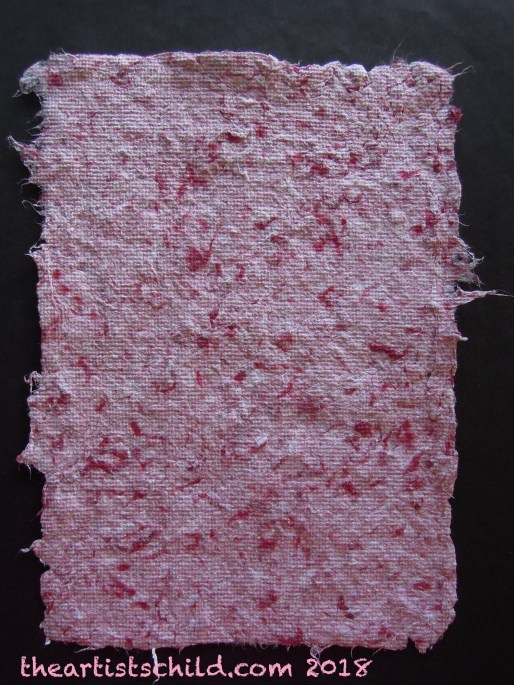
Texture rag paper once dried
That’s when we discovered that professional hand-made paper makers use a machine called a Hollander Beater (great name) and the smallest models are AU$2,000 plus, which is way above our budget. As we want the paper for our own use and do not want go into major production this would be an expensive investment. This was all a bit disheartening but barriers always make me more determined to find a solution. First we thought of using cotton linter (cotton waste from the ginning process) rather than rags, but could not find an Australian supplier for small quantities and it is just too expensive to buy from overseas if shipped here at all (crafters in the US are spoilt for choice). You could use cotton balls but that is hardly recycling and you would need an awful lot.
Ellie went back onto the net and did a lot of research and came across a suggestion from someone who had the same dilemma (click on this link). If you do not have a Hollander beater use a washing machine to break down the cut up rags, as well as a clothes dryer if you own one. The one-inch square rag pieces are placed in fine mesh lingerie bags and the machine set to a heavy-duty hot water wash cycle with some sodium bicarbonate. Pretty much the opposite of what you should do if you want to preserve your clothes. You would not need to boil up the rag pieces if you put them in the washing machine.
Cotton rag squares ready for washing machine
We tried this out and the cloth became much more fibrous, and was easier to pulp in the blender. You need to do small quantities at a time or risk burning out the motor. We have quite a powerful one and need to wear ear protectors or risk going deaf from the high sound levels. Any lumpy bits of pulp can be cut up and put back into the blender to break them down. We have decided to process a lot of rag material then go back to making the paper. The pulp can be dried for storage and the warm water added when you begin the paper making. We hope that we have better luck with the next batch.
The downside of all this is that it is quite time-consuming. It would be much easier to make paper from shredded computer documents, but this is not acid free or archival. I think I will concentrate on making decorative cotton paper first until I get the hang of it. You can also press the paper dry with an iron to make it smoother or put the newly made paper between smooth cloths or felt before it is pressed. We used Chux cleaning cloths, which give the paper texture.
Sometimes in the initial stages of learning a new skill you are unaware of the pit falls. In some ways this is just as well because you might not try something new if you think it is going to be too hard and the challenge to find solutions is good for your creativity. And if you don’t have all the right equipment there is usually an alternative. It might not produce perfect results but it could also lead to some very creative work that makes the most of imperfection.
Ellie and I will see where this leads. Whatever the results of our rag papermaking we will be able to use it in our artwork to trigger our imaginations. Experimentation does make life and art more interesting.
Kat
For those of you wondering what on earth is a Hollander Beater, here is a very short video of a paper maker demonstrating this machine and the pulp it produces.
Isn’t it funny how we put up with things that annoy us for ages before doing something about it? It can be an object that you use everyday, a process with an aggravating glitch or just something that keeps getting in your way. Often these are just irritations but sometimes an inefficient item can even damage your health. Whatever the level of frustration anything that continually bugs you is energy sucker and rather that put up with it you’ll have less stress if you use your creativity to eliminate the problem.
Minor irritations usually just require a bit of creative thinking to make them disappear. Before we had our kitchen renovations, we had nowhere to put our trays. Many were too wide to fit in a cupboard so these were stuck against the wall at the end of a bench and would fall over all the time and send something else flying. Drove us crazy. When we bought some metal shelves to hold a small dishwasher and the microwave there was room for the trays but no way to stop them from falling over.
Ellie and I went looking for a solution and found an old wooden Bookmaker’s Stand in a vintage shop. Bookmakers would stand on this small wooden platform at country race meetings and the punters would place their bets. Fortunes must have been made and lost on this stand. There were spaces between the slats and when you put down one of the folding legs, it became an angled rack for our trays. Problem solved and it had a great story as well.
A tool or a piece of equipment or a process that causes physical pain definitely needs to be changed. I have been cutting up lots of old clothes for rag paper-making, which is a great way to recycle and eliminate more clutter, but have found that I don’t have the right scissors for the job. I have sharpened and tried the various ones we have in the house but they all cause hand and wrist strain from repeated use. As I don’t want to get RSI in my right hand I have looked online for ergonomic scissors and there are several options, although some are quite expensive. I will probably go for the medium price range. Looks like it will be money well spent because RSI is worse.
In the meantime changing the working method has helped. Ripping the fabric into long strips, rather that cutting reduces the use of scissors and I only have to cut the strips into small pieces. Rethinking a process is a good way to solve a problem.
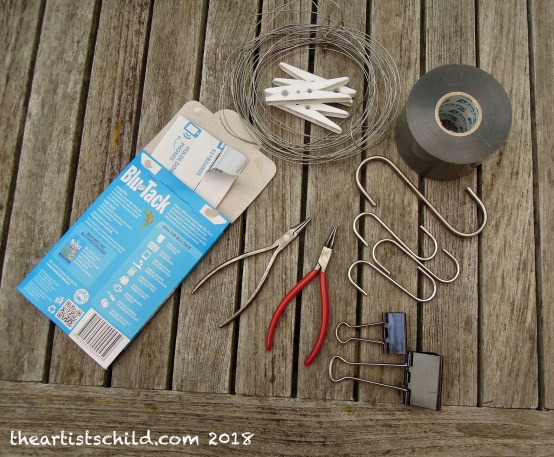
Quick fixes are often all that is needed when something is bugging you. I always have duct tape, Blu-tack, wire, bulldog clips, pegs and metal hooks handy when a temporary solution is all that is required. These can be used in all kinds of situations to hold or hang items around the house and garden or for use in creative work. As well as the usual types of tools, jeweler’s pliers are invaluable for fixing fiddly things, like jewelry or bending fine wire. Of course there are times when you need to consult an expert. If a problem involves electrical or plumbing repairs DIY is probably not the safest way to go. A bad situation could escalate into an awful scene from a sitcom.
When you don’t have a lot of space for your creative work anything that gets in the way becomes an annoyance. At the moment we have a folding clothes rack in the studio for drying towels and sheets inside during the winter as we don’t have room for a clothes dryer. This has been bugging me because it takes up a lot of space. As it is summer I have folded it up and it feels much more roomy. I don’t want to put it up again in this spot so I need to find a solution to this problem. I’m still mulling about it but I’m sure an idea will come to me. Some resolutions take longer than others.
The thing is there are always solutions to problems if you put your mind to it. Irritations can inspire original ideas and are a great incentive for all types of creativity and you’ll feel a lot better when you make them go away.
Kat
In the spirit of fixing stuff here’s the wonderful David Byrne with Broken Things.
While the east coast of North America freezes Victoria is melting. Today in Melbourne it’s expected that the temperature will reach 42°C and in the north of the state up to 45°C. In our house we have an old air conditioner and several fans so we do not suffer from the heat too much, but the garden is a different story. At these high temperatures plants will burn, so it is important to find some way to protect them from the hot sun. This often requires all kinds of creative solutions.
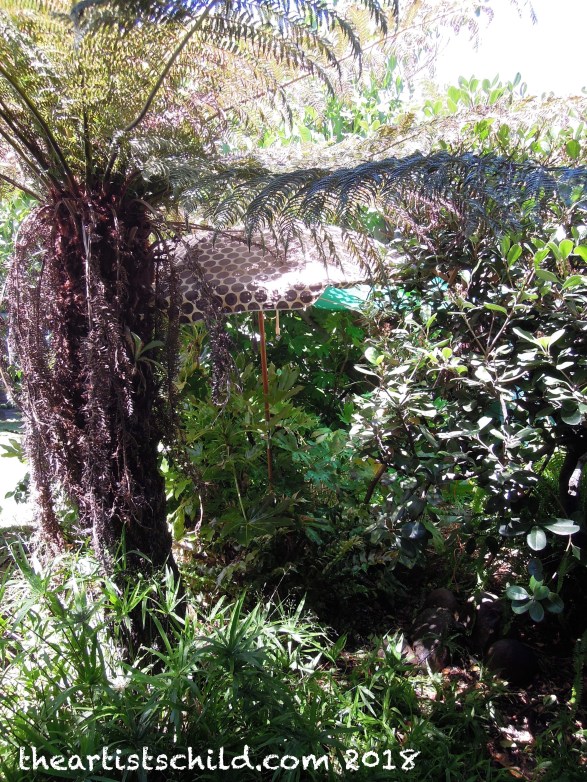
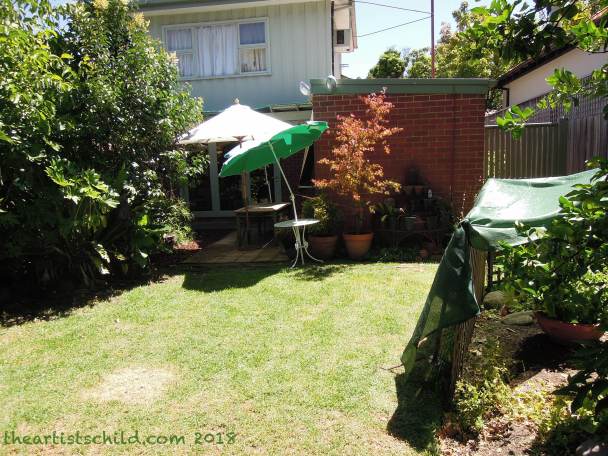
In 2009 when Melbourne reached 46° we threw old sheets over many of the camellia shrubs and this worked quite well. If it was going to be this hot I would probably do the same but 42 is not as fierce. One of the easiest ways to protect plants from the sun is to use umbrellas. This morning, before it became too hot, we put every sun umbrella we own, including market, beach, some of which are really old, over vulnerable plants. As the wind is picking up we tied these to a branch or structure so that they won’t fly away.
Another useful item that can be quickly employed to protect the garden and house in a heat wave is shade cloth. We have pegged lengths of this to a clothesline to protect the fernery, put it over the pergola to shield our family room, and have draped it over some moveable trellis to shade some of our herbs. It may look strange but if it does the job, who cares.
We watered the garden really well this morning so we hope that the plants don’t get too stressed. The forecast predicts that from 6 to 7 pm there will be a gusty cool change with 90 km winds and the temperature should drop about 15° in minutes. Typical Melbourne weather, but really dangerous in these hot conditions if there are any bushfires. Let’s hope that there aren’t any.
It is a day of Total Fire ban for the whole state. This means that no one can light a fire in the open or use any equipment that might cause a spark. Fire restrictions seem to be something that is unique to Australia because when I Googled the subject the only results referred to our country. Living with the threat of bushfires has been a reality for generations of Australians and fire restrictions are an accepted part of life. This morning Ellie saw one of the Sky Cranes (water tanker helicopter) flying past that Victoria hires from North America every summer to work with our water bomber aircraft. One is called Elvis. The pilots are legends here and have saved many properties (and lives) by dumping huge volumes of water in the nick of time. It’s great that they are here but I hope they don’t have a lot to do!
When the weather is this hot it is best to avoid activities outside, so it’s a great time to get on with creative interests indoors. Ellie and I have been cutting up old clothes to use from making paper. We are still waiting for the kit to arrive but when it does we will have enough material ready to start making rag paper. It is easy to long strips into small pieces while watching TV. I also find it quite meditative process, although you need to take breaks to avoid getting cramped hands from the repetitive action.
Whether you are experiencing extreme cold or heat it is good to come up with creative solutions for coping with the weather and protecting your garden. These extremes of temperatures also are a great excuse to get on with your indoor creative activities.
I hope that wherever you are in the world you can find your comfort zone to be creative.
Kat
Here’s the song that inspired the title of this post, The Heat is On by Glenn Frey.
Often at the end of the year you can feel a bit jaded after the craziness of the silly season and need of a break. It is good to use the holiday period to refresh yourself so that you can begin the New Year feeling inspired again. That creative fire needs to be rekindled.
We are lucky in Australia that our New Year holidays occur in summertime and can get outside in the fresh air and enjoy nature. It is a time to try to unwind, read some good books, do some easy exercises and enjoy great food. Once you are sufficiently chilled out it is easier to let the juices start flowing again and come up with plans and ideas for future projects.
Over the break Ellie and I have been doing just that, clearing our heads and discussing creative ideas. As we have a lot of old cotton clothing that is only suitable for rags we decided to have a go at rag paper making so that we have some interesting paper for art and craft projects. Paper can be really expensive, especially acid free and interesting textured paper. It is also a good way to recycle old cotton and linen.
You don’t require lots of equipment for making paper and can do this in the laundry or any wet area with a sink and bench. You just need a deckle (wire screen) and a larger mold (frame) to fit tightly around this. You could make these yourselves (click here for “how to” instructions) or find an inexpensive kit online. We have gone with the latter option and are waiting on delivery.
An old blender will turn small pieces of rag into pulp. Also you would need a large plastic basin in which to mix the rag pulp then dip the deckle to capture the fibres, which form the paper sheets. Pieces of plywood are good to use as a paper press either weighted down by heavy books or feet and any flat surface can be used to dry the sheets. Here is a good website which shows the basics of papermaking with all kinds of suggestions for equipment and materials (click here).
I can’t wait for the kit to arrive and to start experimenting will different textures and types of pulp. Then there is the creative joy of using the finished paper in an art project. I hope to share the process in this blog when we have something to show.
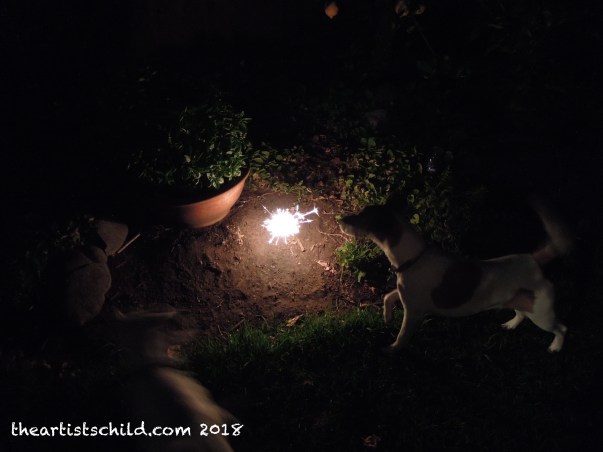
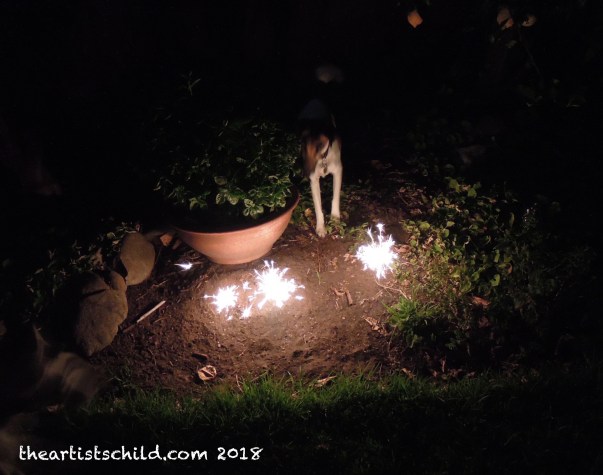
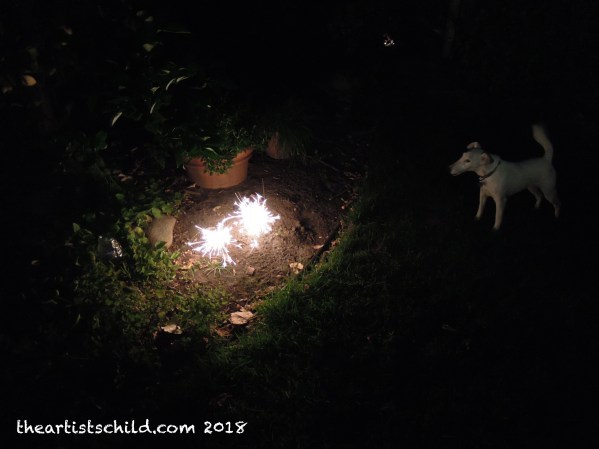
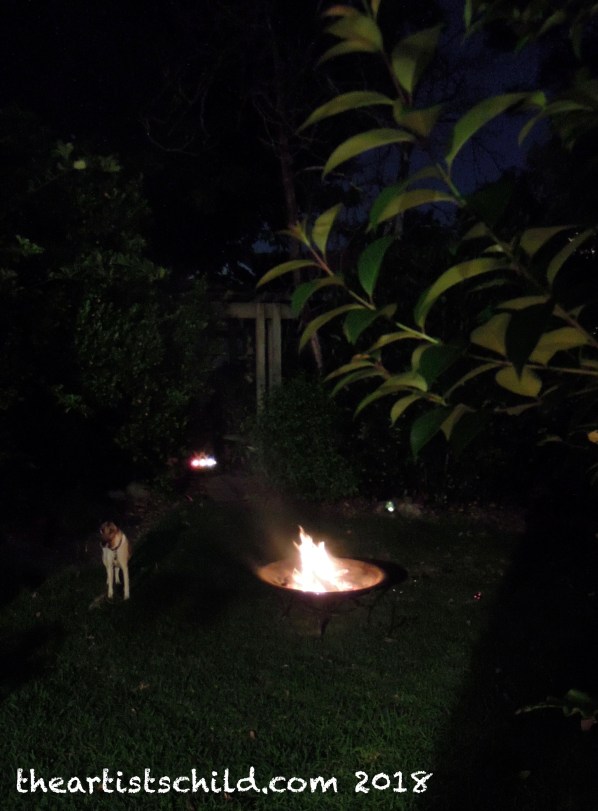
We had a lovely New Year’s Eve out in the garden. Because it was a cool night and everything was green from recent rain we lit a fire in the metal fire pit, as well as some candles. The dogs were fascinated by the sparklers and barked and tried to bite these as soon as you stuck them in the ground. It was a very noisy process. They did not seem phased by the large booms coming from the city fireworks because they were with us. I took some photos of their antics. Some of them were in focus!
I hope you are also fired up to do more creative projects in 2018 and feel reinvigorated from the holiday season.
This post began with a hole in the wall but more on that later.
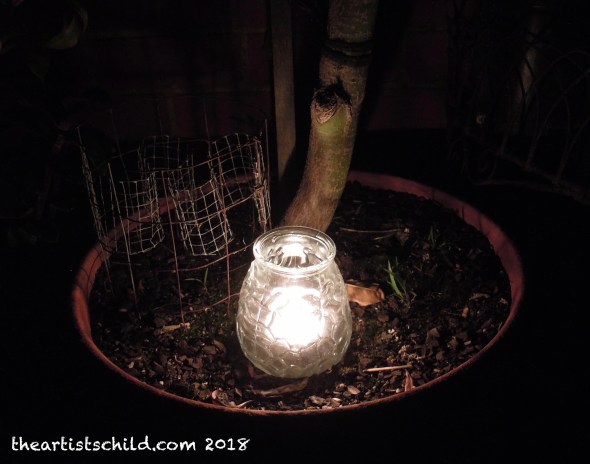
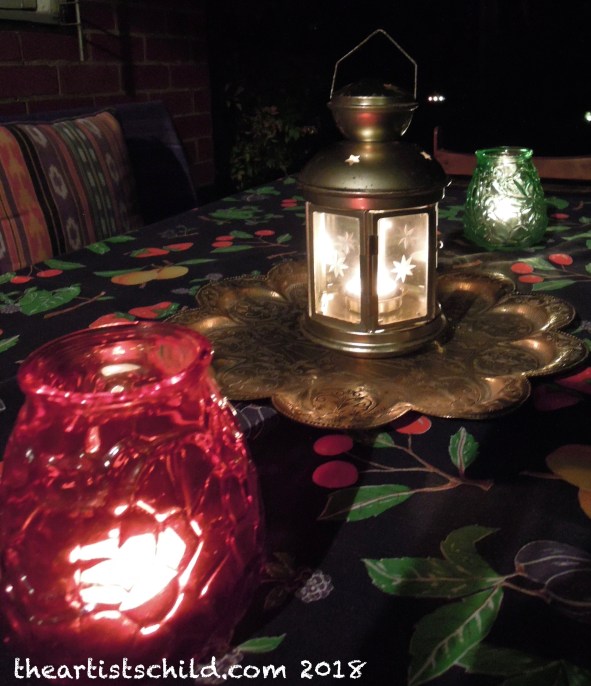
New Year is rapidly approaching. At this time of year I love to light candles, which can symbolize, peace, hope and wishes for a new beginning, as well as remembrance of what has gone before. Candles also give a relaxing atmosphere to the home, especially if they are scented and can also repel mosquitos outside (citronella and lemon grass). Having candles on your table will make even the most basic meal feel special.
Candles are beautiful decorations for any celebrations. With the lighting of candles also comes the responsibility of avoiding any type of fire. Outside when it windy or there is a day of Total Fire ban, it is wise to put candles in an enclosed container, like a tulip shaped holder or a lantern. This is much safer than lighting fires outside in the summer.
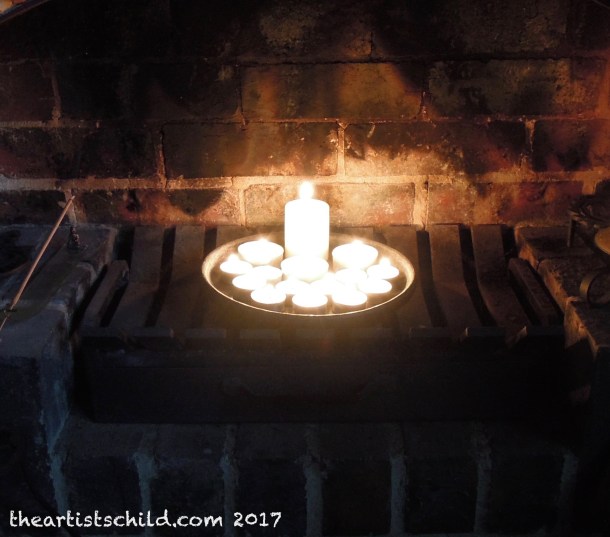
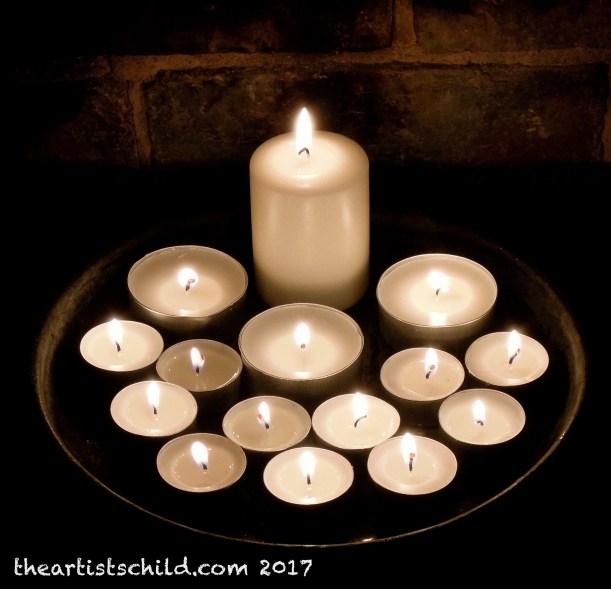
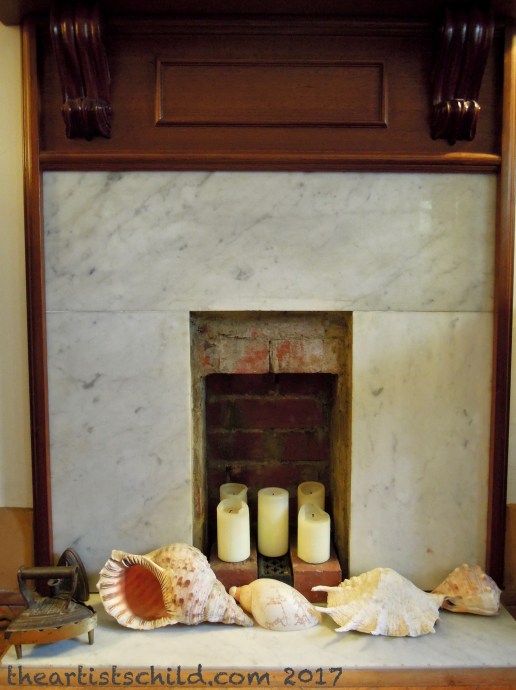
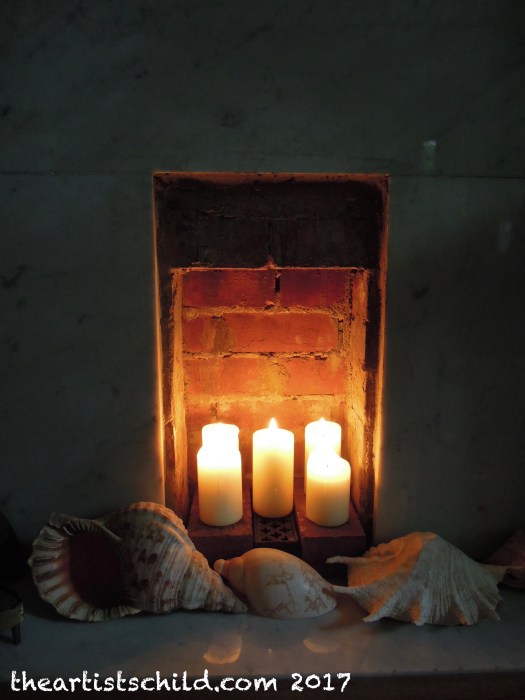
Inside you must be especially careful with naked flames. I like to put candles or incense in our fireplace for safety and any smoke will go up the chimney and not set off the smoke alarms. I can leave these without worrying that the house will burn down. If you have a fireplace candles look great in summer.
In our front living room there used to be an old gas fire that became dangerous so we had it removed. There was now a shallow hole in the double brick wall. We wanted to fill this with a simulated log gas fire but could not find one small enough to fit the space. We were left with a wooden mantelpiece with marble surrounds and a hole in the wall. A decorative screen has been hiding this for several years.
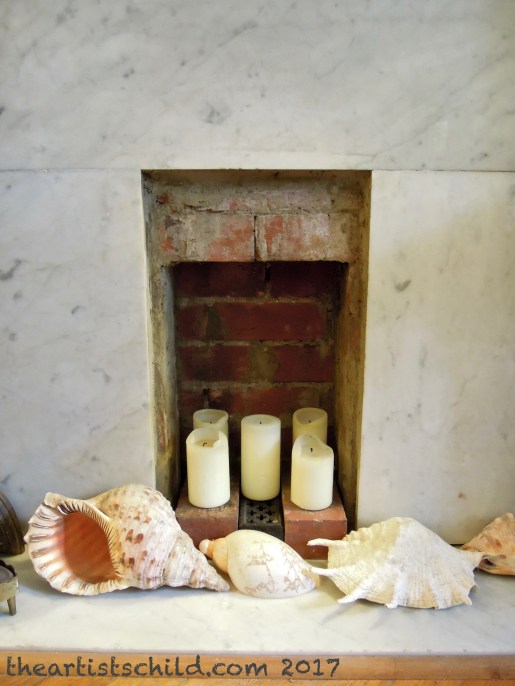
The creative mind can work in funny ways. On Christmas Eve I suddenly had a bright idea about how to turn the hole into a feature. It is so simple I could kick myself and wondered why I had not thought of this a long time ago. I selected a couple of used bricks left over from our renovations, as well as a very old decorative cast iron vent that came from some relative and placed these in the bottom of the opening. With the addition of several pillar candles we now had a niche that creates the effect of a fireplace without the heat. This is great for summer and will also look welcoming in the winter. I put some old shells (collected by an ancestor in the 19th century ) onto the hearth as a reminder of the sea.
There is a gap in the double brick wall at the top of the hole that acts like a chimney for the candle smoke so that this will not build up in the room. As the whole niche is made up of bricks with a marble surround, everything is flame proof. Pillar candles can build up a lot of heat so this is important. You should never put candles in an enclosed flammable space.
It would be quite easy to make a faux fireplace from scratch. I’ve seen examples on Google image search that can be as simple as a brick ledge against a wall with a wooden beam placed high above to act as a mantle. Old reclaimed mantelpieces can also be placed against a wall with a fireproof ledge in the opening to hold candles. Just make sure that any wooden features are far enough away from the flames so that the mantelpiece won’t catch fire. To limit smoke use slow burning natural candles like soy or beeswax.
If you have nowhere inside to safely light candles, outdoors you could create a niche against a stone or brick wall, turn a large rectangular concrete planter on its side or end, or put candles inside a chiminea. There are so many creative ways to make safe candle holders.
Turning that useless hole into something fun has raised my spirits. It is good to solve an annoying problem before the New Year. Ellie and I will be lighting our candles in the niche, as well as in the fireplace, to farewell the old and welcome in the New Year. We wish everyone a bright and very happy 2018.
Kat and Ellie
Looking through a long list of songs about candles on Google, the number one song and probably one of the most uplifting is Melanie Safka’s Lay Down from Candles in the Rain, that she wrote about the Woodstock music festival in 1969. As it is the summer season of music festivals in Australia, here is a live version she performed on Dutch TV in 1970 with the Edwin Hawkins Singers, where she also tells the story of the song.
Today is really sunny and I’m sure lot’s of Melburnians will be outside for their Christmas Holiday celebrations. December has been both very wet and warm this year in Melbourne and our garden has benefited. Everything is green.
Due to all the rain the Christmas Lilies came early and suffered a bit from the humidity but the Japanese Irises have gone berserk. Here are some photos.
We did not put any presents under our tree for obvious reasons.
Wishing everyone a very happy holiday where ever you may be.
Recently I read an article on a local paper that had suggestions about how to decorate your home for Christmas with minimal decorations. Although I like to reduce clutter, I think this is a step too far. Wiping out all the reminders of past celebrations, especially if it helps you to remember people who are not around anymore, is a little bit harsh.
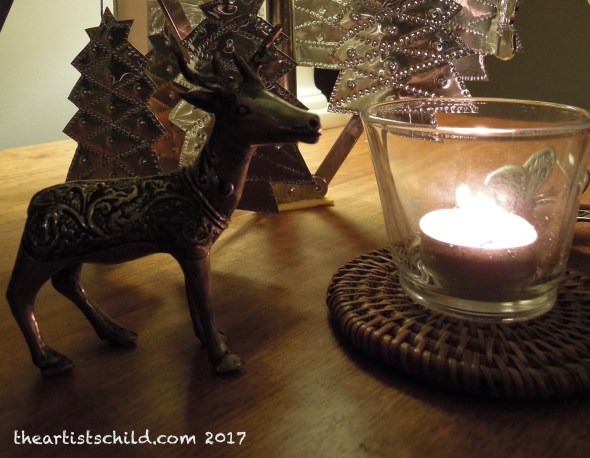
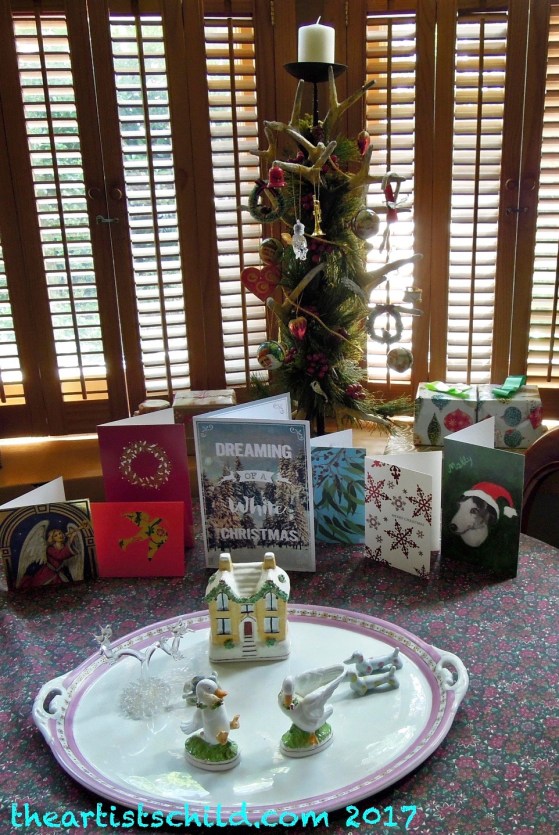
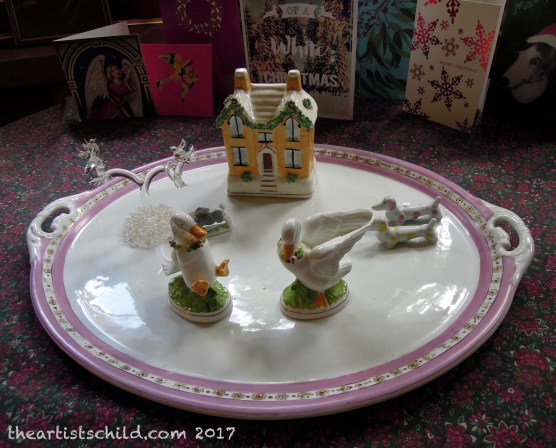
While Ellie and I have some simple modern decorations in our family room, we still like to have a corner of the house devoted to tradition and to remember the good times and those who made them special. Many of the items that we use as decorations were gifts or inherited from relatives or friends, such as the objects in the winter scene I created on an old china tray in our front living room. I had fun with dachshunds chasing a hare under an “ice” tree and happy Christmas geese who’d managed to dodge the pot.
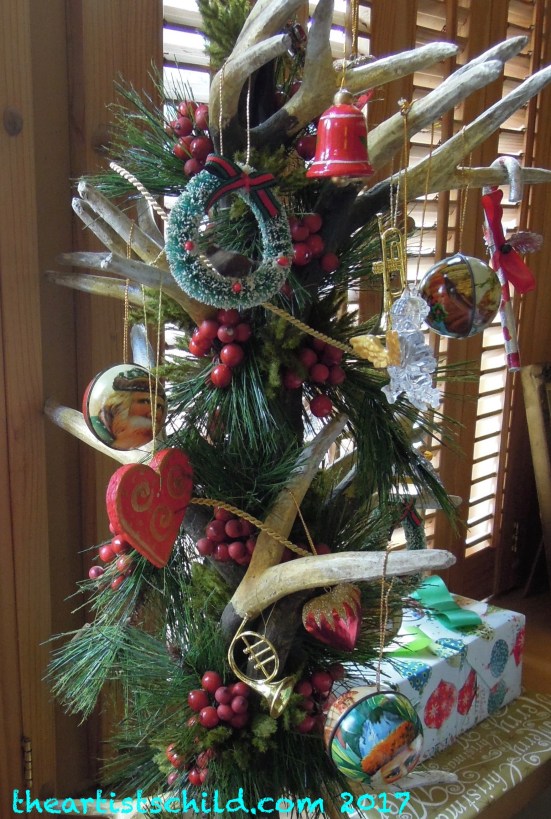
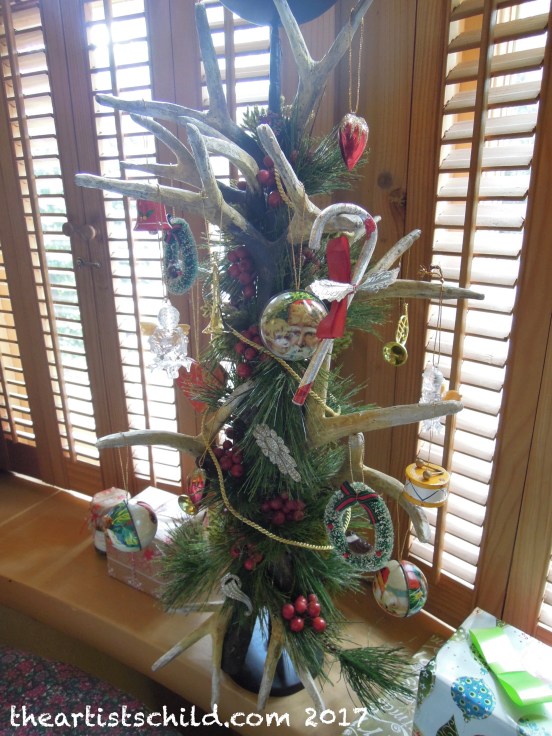
Hanging on a faux stag horn candlestick are some Santa balls that are reminders of a happy celebration with our mother. These were among the baubles on a large cut Christmas tree (a Monterey Pine) we decorated for a family party. I think we used every decoration we owned on that tree, plus some inexpensive papier maché ones we bought at a two-dollar shop. We dressed up in costumes from the 1890s that Ellie sewed or were put together from charity shop finds of blouses with mutton-chop sleeves. All our guests came in costume, including an uncle looking very dapper with a fake moustache, straw boater hat and striped blazer.
Pillar candles and bowls of evergreen plants, like ivy, from our garden, decorated two tables, with an ivy swag running along the stair banisters. Ivy swags were also draped around the fireplace, with bowls of Cyprus pine on the mantelpiece. Below this hung colourful woolen Christmas stockings. As it was summer pillar candles filled the fireplace. We did not turn on the electric lights and used candles and old oil lamps as lighting. The only concession to modernity was a hidden stereo playing classic Christmas carols.
Ellie and I made the Christmas crackers (bonbons) from gold, silver and Florentine paper. Inside we included homemade crepe paper hats, small inexpensive gifts, like little wooden scoops, sets of dice or decorative bottle stoppers and some really terrible jokes. We had the traditional roast dinner followed by plum pudding and there was lots of merriment. It was one of the most enjoyable Christmas parties we have ever had.
The candy cane also hanging on the candlestick is an old family decoration that came from our grandparents and brings to mind childhood celebrations with our father. I also made the large red heart from salt dough during a craft session with a friend. So many good times to remember.
Maybe I’m being sentimental but I don’t want to eliminate all of the past just to embrace the latest trend, which seems rather cold and the opposite of the festive spirit. Keeping some old decorations means you can still hang onto your special memories while you make new ones.
I hope everyone has a wonderful festive season.
Kat
I love schmaltzy Christmas songs and here’s a medley that includes a great version of Brenda Lee’s Rocking Around the Christmas Tree performed by Michael Bublé and Carly Rae Jepsen.
Libertas: personification of the political libertas that distinguishes the free from the enslaved; Americana: the feminine noun or adjective referring to American culture.