Peppers, Paper and a Peculiar Sunset

DSCN6438

Why is it when you are all fired up to do something creative a situation arises that gets in the way? Yesterday I had planned to do some writing for this blog when our washing machine decided to overflow from the top as well as developing a leak underneath, probably from one of the hoses. Much of the day was wasted with moving the steel bench and it’s contents out of the laundry so that we could get behind the machine to see if it was fixable then trying to find a repair person.

We could not get anyone to come before next Thursday. A plumber had told us to hang onto this older machine for as long as possible because it was very sturdy and he said that with many new models, you were lucky if they lasted 5 years so we want to have it repaired if possible.

As the dirty clothes will pile up, what could we do until then? Luckily Ellie found that we could do our washing if the machine was partially filled and set to the final rinse and spin cycles. This took ages because the leaking water had to be mopped up all the time. After all the things that had been drenched by the overflowing machine had dried out, it all had to be put back into the laundry. Luckily it was a day of 35°C which was great for drying things but not wonderful for staying cool in a crisis. Sometimes life gives you hot Chile peppers like the lethal ones in our garden.

Modern technology can be trying at times but it would be much more time-consuming to do the washing by hand. There was nothing we could do to prevent this annoyance, so I had to accept the fact that it was necessary to focus on the task in hand rather than to do what of had planned. On top of this I could feel the onset of a sore throat (probably from the heat) so decided to have a relaxing evening and not to stress.

Version 2Version 2

On a more productive subject, the papermaking has been going well. We have found that mixing colourful bits of cotton fabric, which has been put through the washing machine and the blender, then mixed with the paper pulp, creates lovely decorative sheets. Below are some examples of Ellie’s work.

Version 2

Version 2

If you put some pieces of thread on the surface of the paper after it has been couched onto the wet cloth, press and dry it, then iron the sheet under a damp cloth, when you peel off the thread it will leave an embossed effect.

Putting loosely shredded cotton onto the paper while it is still in the mould will create surface decoration that is pressed in when the paper is couched onto the wet cloth. Here are some of Ellie’s.

Version 2

In Australia it is now autumn and we have been having some beautiful sunsets. I photographed one of these from the studio last week and once I downloaded the photo onto the computer I noticed something that was not there when I looked out the window. There seemed to be a large UFO hovering in the sky with another one in the distance. How could this be?

Version 2

Then I realized that the lights have been on in the studio when I took the photo and were reflected in the window. It was just a trick of the light.

Version 2

Seeing is not always believing.

Kat

Here is a fun song, UFO, from Australian band Sneaky Sound System from ten years ago. It still sounds great.

Truly Inspired by A Guy Called Bloke

Version 2

The Three Graces (detail)

My blog had the privilege of being featured on fellow blogger A Guy Called Bloke‘s Truly Inspired series.

Here is the link: Truly Inspired: The Artist’s Child

Check out his wonderful poems and writings while you are there.

Woven Baskets: A Living Tradition

I noticed that there is a Lost Trades Fair in Kyneton, Victoria in March. Amongst the crafts featured is basket weaving. I had not realized that this craft was in danger of disappearing. I can remember a time when mum would order handmade wicker baskets from a craftsperson to be used for food hampers that were raffled at our school’s fetes. After doing a Google search, it seems that these traditional basket makers are no longer around in Melbourne (or very hard to find) and most available cane or willow wicker baskets seem to be imported from overseas where such materials are common and still used by craftspeople. Nowadays it appears that many Australian basket weavers are now using local materials and traditional Indigenous techniques. Hand woven baskets are useful and wonderful to collect.

Basket weaving is a skilled craft undertaken since the Neolithic period. Most cultures have some form of basket weaving tradition. These hand-woven articles are really useful for storing all kinds of materials and tools. If they are beautiful that’s even better and the colours and textures of baskets are also very inspiring.

In Australia Indigenous weavers make wonderful baskets. Sometimes these are the only items of women’s work that have survived from past centuries. Luckily this knowledge is being passed on to future generations and to non-indigenous women at local cultural centres. The materials used are more sustainable because they are found where the weavers live. Here is a video of a workshop that took place in Victoria.

Many indigenous fibre artists have made some incredible artworks using their basket weaving techniques.  I wish I had an example. Their work is influencing other non-indigenous craftspeople and basket weavers who are now incorporating indigenous techniques and using local materials to create their own original designs. Here is a link to some of the magnificent basket work you can see on The Basket Weavers of Victoria website (link).

Ellie and I have a collection of traditional and decorative baskets, some bought in stores specializing in handwork from other cultures, some found in charity stores, others inherited from relatives. They are a terrific form of craftwork to collect that you can use while you are working or can be filled with all kinds of things to organize your space. We also have some interesting fibre objects that show the ingenuity of weaving with plant materials.

If we see an old wicker or willow basket in a charity shop, we snap it up and have kept those that came from family. Our collection includes a large bread basket; shopping baskets; large round baskets; a huge wood basket; a picnic basket; laundry and dog baskets and various small baskets, all of which we use. Modern storage baskets are also useful and as they are not made of plastic, better for the environment.

Version 2

Baskets are usually made from plant materials that are readily available to the weaver. The following Asian baskets are made from split bamboo. The largest one with a lid is really old and come from a relative who used it for her needlework. It is an example of Chinese basketry work which I use to store craft materials. The other shallow round basket is Japanese and was found at an op shop. Also made from bamboo using a delicate, open lattice pattern. I have seen similar baskets attached to ivory figures in  antique Japanese carvings. Judging by what I have seen on Google it is probably from the mid twentieth century. I use this basket for holding weaving threads so that it does not become damaged.

Version 2

The small oval bamboo basket was a gift from our grandmother. A local craftsperson glued the shells to the lid and lacquered the surface. We have several of these baskets in varying sizes and they are great for storing small items. I don’t think that they were very expensive baskets and would be good for decorating in all manner of ways.

Version 2

We have several African shallow baskets that are perfect for holding tapestry bobbins while you are working. These are all from Zimbabwe and we bought them at local store that sells African wares. The medium-sized basket is a binga basket made by the ba Tonga people. It has the characteristic herringbone edge. The smallest one is a tightly woven Ukhomane basket with a checkered rim. The largest basket, which is a type used to sort and clean maize and is similar in design to the Ukhomane but has a herringbone rim so seems to be a combination of the two styles. What I like about these are the abstract patterns and earthy colours and are not too dissimilar to the look a woven tapestry. They are a pleasure to use. African baskets are available online.

Another op shop find is a large old picnic style basket with folding handles from the Philippines. It is great for storage in the studio with an inner tray for smaller items. It is unusual and I could not see a similar one on Google. My guess would be that it’s from the 1960s or 70s.

A very small, lidded basket that was inherited is a bit of a mystery. It was a gift from a relative who was an intrepid female traveller in the early 20th century. It looks like it could be African but is also might be woven from pandanus palm like some of the work of Australian Aborigines, but it is hard to be sure. Apparently she was quite a character. We have a photo of this relative seated in a canoe on the Zambezi River where she visited Victoria Falls. She may have found the basket while on this trip.

Version 2

Other woven items include a Zimbabwean Gudza (fertility) doll that I received as a gift and a woven cup that Ellie found at an op shop. The latter looks African and is very decorative rather than functional. We also have a lovely woven figure holding a basket. It could be woven from some kind of palm leaves, reeds or banana fibre. We don’t know its origins but it is still a testimony to the weaver’s skill. I have placed the figure with some bird’s nests from our garden, examples of the first woven baskets.

Basket weaving techniques can be used for all kind of objects like this woven football that is used in the kickball game of Sepak Takraw, in Malaysia and Thailand. We have three in the studio and they are beautiful, sculptural objects.

DSCN6526

Textures of baskets can influence and inspire tapestry weaving. Here is one of my samplers with areas of raffia and natural string fibres that show this influence.

Version 2

Baskets and objects woven using similar techniques show the diversity of the weaver’s craft in different cultures and make an interesting collection. It is wonderful to see that there are still craftspeople rediscovering ancient methods and using them in a sustainable manner. Whether they are old or beautiful, all baskets are great to use.

Kat.

This song and video of Buffy Sainte Marie’s Changing Woman weaves magic. (You Tube took down the wonderful psychedelic video I had before but here is the song).

The Tipping Point

scale-2634833_960_720

When you are doing something creative have you noticed sometimes there is a point where everything can suddenly go wrong if you don’t immediately adjust to the situation? I guess this is also echoed in our way of life. In many areas we have reached the tipping point for our planet. This is a good reason for artists to use recycled materials.

I read on a local news site yesterday that China is no longer accepting waste materials from Australia for recycling (link to article). This means all the plastic and paper that was to be sold to China will go into landfill if it cannot be recycled here. Councils are now asking ratepayers to cut down on the amount of waste for their recycling bins. This is the result of sending our problems overseas and not finding a creative solution for recycling large quantities of paper and plastic in our own country. If we are to prevent turning our environment into a tip and being swallowed by mountains of rubbish, it will take a change of mindset for our society, which won’t be easy. At the very least, as artists, we can recycle materials in our work.

Many local artists and designers have already been using recycled items to create works of art and are trying to make a difference no matter how small. It is also good for the soul to turn rubbish and junk into something beautiful, as well as unique. Here is a link to an exhibition Turning Trash to Treasure held at the South Melbourne Market in September 2017.

Reusing old materials is a source of inspiration and often requires a lot of rethinking when you run into difficulties. Ellie and I have been learning to make paper from old cotton rags and clothing for use in artwork. We have been having problems with making a very fine pulp, as mentioned in recent posts. This requires breaking down the cut-up rags in the washing machine and repeated processing in the blender.

Version 2

It is quite time-consuming so we decided to mix this with a pulp made from shredded computer documents and other paper of a reasonable quality. We found out that if you add calcium carbonate powder, also known as whiting or chalk, this will make an acid free pulp (here are the instructions: How to make Acid Free Paper). We bought some from our local art supply shop as it is used in printmaking. We have also decided to size the paper with a clear artist’s gesso after drying rather than adding starch to the pulp.


Papermaking is a really good way to use up old paper rather than putting this in the recycling bin. Last weekend we started making paper with paper pulp on its own to get a feel for the process. This was totally different from the cotton pulp. The first day that we tried this the pulp was a bit lumpy and so some of the sheets were a little thick. When dried this it looked like the recycled molded cardboard used to separate wine bottles in the carton, which was not what we were going for.

DSCN6356

We had also obtained a smaller A5 mold and deckle to make cards, which was easy to use and required less pulp. As the lumps disappeared from the pulp mix the paper became thinner and smoother.

Version 2

When we began doing this outside under some sun umbrellas it was quite warm. Just as we were starting to get the hang of the process the sky darkened and there was the sound of distant thunder. With the storm getting closer it was quite hard to concentrate. Not wanting to be stuck outside with lightning imminent we hurriedly packed up and put the paper in the press under the car port then dried it flat inside. After drying the paper was pressed under a pile of heavy books because it had curled a bit.

DSCN6367

The next day it was even hotter and we decided to continue the process under the car port just in case the weather changed. The pulp had softened even more and was a better texture. Because it was thinner we had to be careful when getting it off the deckle. The cleaning cloths that we use for separating the paper sheets need to be really wet or the paper won’t come off the deckle. The hot weather didn’t help and we had a lot of disasters before getting this right. If you sponge the back of this once it is upside down on the cloth the paper comes off more easily.

DSCN6378

We noticed that there was a variation in thickness of the paper but it was better than the day before. If the pulp mixture became too thin the paper was more likely to fall apart when transferring it to the cloth so it was necessary to add more pulp when this was starting to happen. You had to watch out for this tipping point to avoid failure.

DSCN6380

When we had finished we pressed the sheets between our plywood boards with bricks on top and dried them by pegging the backing cloths on a drying rack. This worked better than trying to dry them flat on a surface. Some sheets are better than others but we can experiment with the sizing on some or use them for collage so nothing is wasted and we can always re-pulp sheets that are too horrible.


Version 2

Next we are going to try some shredded magazines together with recycled computer paper to see if we can make some interesting decorative paper. After we have reprocessed some of the colored fabric we can include a small quantity of this fibre in the mix.

DSCN6400

Individually we might only be using a relatively small amount of recycled material but it’s better than doing nothing. It’s a pity that more local manufacturers are not doing their own recycling of plastics and paper for their products. So much has been done overseas and now that this is no longer sustainable we will all have to be aware of the amount we consume and how to cut this down. This will not be easy so the more people who can come up with creative ways to reuse recyclables, as in artwork, hopefully we can avoid the tipping point.

Kat

There are quite a lot of songs with “Paper” in the title. I love this one from the sixties, Paper Tiger, performed by Sue Thompson. It’s a live version but she is miming and obviously enjoying herself.

Setbacks and Learning Curves


When you teach yourself something new it does not always go to plan. While you might be trained in a related field this does not mean that you will be able to do a new technique well at the beginning. Often you learn things by trial and error. There are bound to be technical difficulties from a lack of knowledge and not having the best equipment for the job, so you spend a lot of time trying to overcome these issues as best you can. It can be a big learning curve.

As I have said in the last two posts, Ellie and I are teaching our selves how to make rag paper. This all sounded very straightforward in “how to do” articles on the net. So we jumped in, bought the basic equipment, prepared the materials and started to make paper outside under the car port. That’s when we discovered this was not as easy as it looked.


Version 2

First sheet out of mould


Firstly we had not made enough pulp to completely fill the tub to make a lot of sheets. The pulp in two colours that we had made in the blender was too coarse and the process was closer to felting wool than paper making, which I have done before. You could plug up any holes in sheets with bits of pulp before taking them off the mold just like you can when making felt. We did not panic when things went wrong but had a good laugh about our shortcomings. The results were quite decorative and can be used in collage but they are not suitable for writing or drawing upon. We had to go back to the drawing board and work out how to make finer paper.

DSCN6328

Texture rag paper once dried

That’s when we discovered that professional hand-made paper makers use a machine called a Hollander Beater (great name) and the smallest models are AU$2,000 plus, which is way above our budget. As we want the paper for our own use and do not want go into major production this would be an expensive investment. This was all a bit disheartening but barriers always make me more determined to find a solution. First we thought of using cotton linter (cotton waste from the ginning process) rather than rags, but could not find an Australian supplier for small quantities and it is just too expensive to buy from overseas if shipped here at all (crafters in the US are spoilt for choice). You could use cotton balls but that is hardly recycling and you would need an awful lot.

Ellie went back onto the net and did a lot of research and came across a suggestion from someone who had the same dilemma (click on this link). If you do not have a Hollander beater use a washing machine to break down the cut up rags, as well as a clothes dryer if you own one. The one-inch square rag pieces are placed in fine mesh lingerie bags and the machine set to a heavy-duty hot water wash cycle with some sodium bicarbonate. Pretty much the opposite of what you should do if you want to preserve your clothes. You would not need to boil up the rag pieces if you put them in the washing machine.

DSCN6314

Cotton rag squares ready for washing machine

We tried this out and the cloth became much more fibrous, and was easier to pulp in the blender. You need to do small quantities at a time or risk burning out the motor. We have quite a powerful one and need to wear ear protectors or risk going deaf from the high sound levels. Any lumpy bits of pulp can be cut up and put back into the blender to break them down. We have decided to process a lot of rag material then go back to making the paper. The pulp can be dried for storage and the warm water added when you begin the paper making. We hope that we have better luck with the next batch.

The downside of all this is that it is quite time-consuming. It would be much easier to make paper from shredded computer documents, but this is not acid free or archival. I think I will concentrate on making decorative cotton paper first until I get the hang of it. You can also press the paper dry with an iron to make it smoother or put the newly made paper between smooth cloths or felt before it is pressed. We used Chux cleaning cloths, which give the paper texture.

Sometimes in the initial stages of learning a new skill you are unaware of the pit falls. In some ways this is just as well because you might not try something new if you think it is going to be too hard and the challenge to find solutions is good for your creativity. And if you don’t have all the right equipment there is usually an alternative. It might not produce perfect results but it could also lead to some very creative work that makes the most of imperfection.

Ellie and I will see where this leads. Whatever the results of our rag papermaking we will be able to use it in our artwork to trigger our imaginations. Experimentation does make life and art more interesting.

Kat

For those of you wondering what on earth is a Hollander Beater, here is a very short video of a paper maker demonstrating this machine and the pulp it produces.

Getting rid of the Annoying Stuff

Isn’t it funny how we put up with things that annoy us for ages before doing something about it? It can be an object that you use everyday, a process with an aggravating glitch or just something that keeps getting in your way. Often these are just irritations but sometimes an inefficient item can even damage your health. Whatever the level of frustration anything that continually bugs you is energy sucker and rather that put up with it you’ll have less stress if you use your creativity to eliminate the problem.

Minor irritations usually just require a bit of creative thinking to make them disappear. Before we had our kitchen renovations, we had nowhere to put our trays. Many were too wide to fit in a cupboard so these were stuck against the wall at the end of a bench and would fall over all the time and send something else flying. Drove us crazy. When we bought some metal shelves to hold a small dishwasher and the microwave there was room for the trays but no way to stop them from falling over.

Ellie and I went looking for a solution and found an old wooden Bookmaker’s Stand in a vintage shop. Bookmakers would stand on this small wooden platform at country race meetings and the punters would place their bets. Fortunes must have been made and lost on this stand. There were spaces between the slats and when you put down one of the folding legs, it became an angled rack for our trays. Problem solved and it had a great story as well.

Version 2Version 2

A tool or a piece of equipment or a process that causes physical pain definitely needs to be changed. I have been cutting up lots of old clothes for rag paper-making, which is a great way to recycle and eliminate more clutter, but have found that I don’t have the right scissors for the job. I have sharpened and tried the various ones we have in the house but they all cause hand and wrist strain from repeated use. As I don’t want to get RSI in my right hand I have looked online for ergonomic scissors and there are several options, although some are quite expensive. I will probably go for the medium price range. Looks like it will be money well spent because RSI is worse.

Version 2Version 2

In the meantime changing the working method has helped. Ripping the fabric into long strips, rather that cutting reduces the use of scissors and I only have to cut the strips into small pieces. Rethinking a process is a good way to solve a problem.

Quick fixes are often all that is needed when something is bugging you. I always have duct tape, Blu-tack, wire, bulldog clips, pegs and metal hooks handy when a temporary solution is all that is required. These can be used in all kinds of situations to hold or hang items around the house and garden or for use in creative work. As well as the usual types of tools, jeweler’s pliers are invaluable for fixing fiddly things, like jewelry or bending fine wire. Of course there are times when you need to consult an expert. If a problem involves electrical or plumbing repairs DIY is probably not the safest way to go. A bad situation could escalate into an awful scene from a sitcom.

Version 2

When you don’t have a lot of space for your creative work anything that gets in the way becomes an annoyance. At the moment we have a folding clothes rack in the studio for drying towels and sheets inside during the winter as we don’t have room for a clothes dryer. This has been bugging me because it takes up a lot of space. As it is summer I have folded it up and it feels much more roomy. I don’t want to put it up again in this spot so I need to find a solution to this problem. I’m still mulling about it but I’m sure an idea will come to me. Some resolutions take longer than others.

The thing is there are always solutions to problems if you put your mind to it. Irritations can inspire original ideas and are a great incentive for all types of creativity and you’ll feel a lot better when you make them go away.

Kat

In the spirit of fixing stuff here’s the wonderful David Byrne with Broken Things.

Wisteria and Witches

It’s October again and in Melbourne we are now in the middle of spring. As I mentioned last October when I started this blog, we have the strange combination of the Spring Racing Carnival and Halloween celebrations. There is nothing more typical of Melbourne than scenes of costumed witches, wizards or zombies mingling with the more traditionally dressed amongst the stunning roses at Flemington racecourse on Melbourne Cup day.

Over the last two weeks I have been busy doing some badly needed gardening. At this time of year the air is sweet with the smell of blossom. Our garden is full of the fragrance of wisteria blooms, which cascade from the branches like waterfalls of white flowers. They are fragile and could be easily destroyed by a spring storm so I have taken photos to remember their beauty.

With all of nature’s exuberance it seems strange to embrace the autumnal mood that surrounds the festival of Halloween. One of the disadvantages of living in the Southern Hemisphere is the topsy-turvy nature of traditional festivals. But at least daylight saving gives us longer hours of light in which to party during these celebrations.

Fun costumes make both race days and Halloween parties more enjoyable. I am a big fan of DIY costumes for both the creativity and uniqueness. As I have mentioned before, you don’t need to sew or spend a lot of money to wear a great costume. A good eye for a bargain and for reworking existing items is invaluable. In the past I have created my own Halloween costumes from clothing found at op shops (thrift or charity stores), weekend markets and by using fabric offcuts, cardboard and paper scraps to make accessories.

Version 2

Illustration by George Cruikshank for The Witches Frolic by Thomas Ingoldsby

Items that can be reused with different accessories are worth collecting so that you will never be stuck for a costume idea. Witches or wizards costumes are a favorite for Halloween and easy to create with black clothes. Using the same long black dress and a charcoal grey cape found at a weekend market, I can transform into the medieval witch Morgan Le Fey or Samantha Stevens from Bewitched wearing her flying costume. All this requires is a change of headgear.

DSCN3733

For the Morgan Le Fey costume I made a type of hat known as a Hennin (seen in gothic paintings) from cardboard covered with black silk fabric and gold paper. It was decorated with gold braid, glass jewels and gold glitter glue from a craft store. I pinned an old black silk scarf as a veil from the top of the hat. To turn the outfit into Samantha, a blonde wig (try to find a better one than mine as it itches) and a witches hat from a party shop are all that is needed to change the look. Black boots complete both costumes.

A simple way to make a witch’s broomstick is with a length of thick dowel and a pile of flexible twigs or thin bamboo (whatever is easiest to find). Just divide the twigs into four equal bundles and tie each securely with some twine. Place the bundles around the dowel and wrap them all tightly together to form the broom. You can wrap ribbon, fabric or raffia over the twine to hide it. Then you’re ready to fly.

Version 2

Whether it is spring or autumn, these are great seasons for festivals and celebrations before the weather gets too hot or cold.  And if you live in the Southern Hemisphere or a tropical location, enjoy the contrast of the light with the “Darkness” of Halloween. You will have the best of both worlds.

Kat

Ukulele virtuoso, Taimane Gardner from Hawaii, taps into the Halloween mood with her haunting instrumental, Rings of Saturn, although she lives in the tropics.

Creative Life: Be Inventive


DSCN5283

We all need some kind of tools to be creative. For those who work with their hands these can be simple or complex depending on what you do. Often due to lack of money or availability art and crafts people have needed to make their own tools and equipment, which has led to some imaginative solutions. I have made some simple examples myself because of the expense or if I could not find something suitable. It is good to be inventive.

Looking at homemade inventions from the past can be inspiring. I have a very old metal yarn winder (a swift) that was inherited from my grandmother. I don’t know where it came from but it was obviously homemade by someone who knew how to use a soldering iron. It is made up of an old curtain rod finial, a metal nut with screw holes on a brass and wooden base, screw-in horizontal brass rods that have vertical brass rod attachments to hold the yarn. Someone went to a lot of trouble to make this winder, probably at a time when they were difficult or expensive to buy. It is quite an ingenious solution to an old problem and might have been created by someone who was sick of holding the yarn as it was wound into a ball.

Everyone who works with yarn needs some kind of winder. I had a look on Google image search and many craftspeople still come up with interesting DIY yarn winders using a variety of materials, from old coat hangers to collapsible wine racks. It is good to see in this consumer-oriented day and age that the inventive spirit is alive and well.

This sort of inventiveness has led to home cottage industries. While I have made my own basic wooden frame looms, I needed a larger adjustable loom for tapestry weaving and found one made be a local man who made these from basic plumbing supplies for a reasonable price. He started out making one for his wife who was a tapestry weaver and others liked his design so he made them for students. DSCN5344

When creating your own equipment try not to get too bogged down in detail. The great illustrator W Heath Robinson was famous for his hilarious drawings of ridiculous inventions and contraptions. These made even the most basic of processes complicated. There is no need to go down this route and it is best to simplify as much as possible.

william-heath-robinson-public-domain-pic-14

Mackintosh’s Toffee Advert, Illustrations by W Heath Robinson, Public Domain Image, freevintageillustrations.com

With very basic carpentry skills you can make all kinds of things with a drill. I made a basic tapestry frame loom shown in a previous post. If you get the wood cut to size at the hardware store, all you need to do is screw it together. I inserted a couple of dowel pegs on each side of the frame to hold a narrow wooden crossbar so that I could suspend my design behind the warp. This made it easier to transfer my designs onto the threads and was an improvement on a simple frame.

Version 2

Ellie also made a pegboard for holding cones of yarn so that it was easy to wind it onto bobbins for tapestry weaving. She just used an off-cut of Oregon pine left over from our arbor and drilled holes for a couple of pieces of dowel. Then she sanded the whole thing and coated it in varnish. Didn’t cost a thing because we already had the materials.

DSCN5323

Sometimes you want to try out a craft but do not want buy expensive equipment, especially if you don’t know whether you will like it or not. This is a good time to create you own. As a part of learning about the weaving process I tried out spinning with a drop spindle (How to video). Luckily a relative who had done this in the past gave me her spindle. It is of very basic manufacture and if you had access to the right cutting equipment you could easily make your own. It only requires a short section of dowel and some thick plywood. Here is a link (How to video) that shows you how to make a similar spindle from scratch or with pre-cut discs.
DSCN5327

But there are always even simpler ways to make tools when you look on-line. It is possible to make a workable spindle using a couple of CDs, a piece of dowel, small hook, some glue and small rubber rings (here are the instructions for those interested).

Finding cheaper alternatives to expensive items is a clever way to learn a new technique. With spinning, the wool needs to be combed (carded) and formed into rolls (rolags) before it is spun. Some ingenious craftspeople worked out that it was possible to use slicker dog brushes instead of costly hand carders for this process. These are a fraction of the price. They might not be quite as good as the proper equipment but are ok for the beginner. I was glad that I had learned something about the spinning process without spending a fortune as I prefer to concentrate on the weaving with ready-made yarn.

Sometimes you don’t want a big piece of equipment cluttering up your workspace especially if you will not use it often. That’s when you need to think creatively. I needed to be able to draw up large designs for tapestry but did not want a large, expensive drawing board table. So I went to the hardware store and had a large sheet of melamine fibre board cut to size. I can put this on my easel to draw and then put it away against a corner wall of the studio for storage. It did not cost much and saves space.

When you can’t find just the right tool it is time to make your own. I wanted a mahl stick. This is a piece of dowel with a padded end that is used for resting your painting hand against when working on fine details. It is essential that padding does not touch any wet areas of paint or cause dints in the canvas surface so it is best that this rests on the edge of the painting. At the time I could only find ones with a short shaft and wanted one for larger sized works so I made my own. All I needed was a long piece of dowel, a champagne cork, some felt, twine and glue. It works really well and I enjoyed some sparkling wine in the process.

A tool can be made from anything if you use your imagination. For textural work with ink or paint I have used all kinds of things to create my own tools. Corks, sponges, a jagged cut toothbrush, pieces of carpet, homemade bamboo pens, disposable chopsticks and skewers can be used. An emery board is great for sharpening charcoal pencils to a fine point. They are so many things that can be employed as a tool.

Whatever your art or craft, it is great to make your own tools and equipment. Being inventive is part of the creative process and what you make can be as basic or as complex as you like.

Kat

It is wonderful to use your imagination. Here’s an oldie but a goodie by Gladys Knight and the Pips.

A Window to the Past

DSCN4382

An old book can be seen as a window into the past and is a way to learn about the lives and interests of previous generations.  In our household library we have an original copy of The Universal Self Instructor (1883) that was a popular book for the home in the 19th century in Australia and America.  In it’s day this book would have given anyone who had basic schooling some kind of further education.  What I find fascinating about this book are the sections related the to the visual arts and crafts, particularly with regard to women.

The frontispiece depicts a goddess figure holding a torch with the words “knowledge is power.”  It was a way to improve your life whether you lived in a city or the country.  This book contains all kinds of information about business, law, agriculture, the domestic domains, leisure activities and general knowledge on many subjects, as well as social etiquette.  It is full of detailed black and white illustrations and is very much a depiction of the ideal life more than a century ago.

There is a whole section in The Universal Self Instructor devoted to handwriting.  It was considered important to be able to write well.  The cursive script is beautiful and would have taken pains to master.  Flourishes and images were added to documents so it was a real art.  Today, unless you are a calligrapher, many people’s handwriting has definitely deteriorated probably due to the constant use of keyboards and the ballpoint pen.  Inside the Self-Instructors cover is a beautiful example of handwriting done by it’s first owner.

DSCN4383

The book is all about rules and shows how restrictive it must have during that period. There are whole sections on social etiquette.  Life was a minefield of manners that included etiquette for introductions, visiting, conversation, public places, clothes, marriage, birth and death, the carriage trip, riding, debuts into society and entertaining. Nothing was relaxed.

DSCN4423

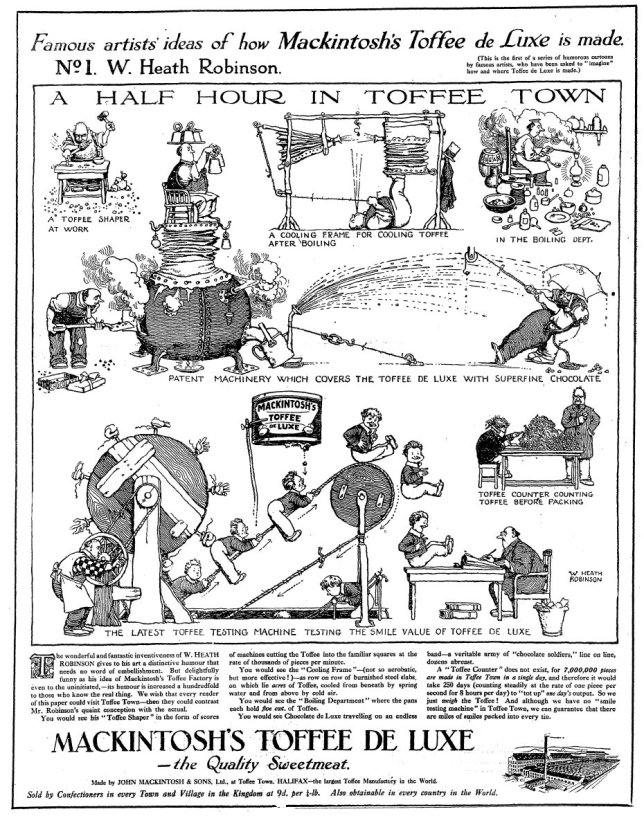
The situation that amused me was the visit to an artist’s studio or gallery exhibition. Artists had reception days when ladies could “pay their respects” to artist friends and were to be on their best behavior.  Pushing in front of others to view a work (something that is really annoying today), talking loudly and laughing were all considered extremely rude and you must never ask if a work is for sale unless you wish to buy it, which seems a bit stupid given that artists are not always great at selling their creations.  In galleries negative comments about the works should be kept to a low voice in case the artist is nearby and you should not linger in front of a work for too long.  Adherence to such etiquette today would make visits to crowded exhibitions a lot more enjoyable and artist’s would feel more comfortable if they did not have to listen to any uniformed criticism.  So not all etiquette is obsolete and without merit.

By the look of the accompanying illustration it was assumed that the professional artist was a man.  Women and girls were expected to keep to the domestic circle.  Girls were to be discouraged from being idle. To quote:

“Girls are very apt to fall into a habit of lounging about doing nothing, gaping out of the windows or napping on the sofas.”

Sounds a lot like teenage boy behavior as well but there is no mention of this.

DSCN4470

To keep them busy, Girls (and boys) were encouraged to learn drawing and painting for pleasure.  It was also a way to decorate the home.  Suitable activities for girls were to paint china, greeting cards, furniture, book covers, and silk for clothing.  Many ordinary women must have produced some beautiful creative artworks, often as a way to save money.

One of our female ancestors was a talented painter who took oil painting classes for young ladies at an artist’s studio in the 1880s.  She did some large paintings of landscapes.  I have included a photo of a small oil painting that she did on glass and a large seascape of Cape Schanck in Victoria (my photo does not do the latter justice as I was teetering on a ladder and kept wobbling).   Unfortunately after she was married and had children she did not continue with her art.   She was probably not taken seriously or encouraged to become a professional artist.  There are a couple of tiny painted china plates in the first photo that were probably considered a more acceptable pursuit for women in that era.

DSCN4452

Needle point items, pressed flowers and moulded bread dough flowers would have been typical crafts of the period

There are all kinds of suggestions for appropriate craft activities for women and girls. Of course there is embroidery, lace work, knitting, crotchet, patchwork and dressmaking, all  popular textile crafts.   There are also crafts such as creating scrapbooks, molding coloured wax flowers and fruit and the making of trifles (not the dessert).  Trifles were attractive but fairly useless little novelty gifts made to pass the time.  Inside the Self-Instructor, which is quite a tome, I found some dried flower petals pressed by a previous owner.  I wonder if they were for the creation of some “trifle.”

DSCN4432

Pressed flowers found in our copy of The Universal Self-Instructor

Another craft mentioned and probably long gone is “wall pockets,” decorative baskets lined with odds and ends of fabric, filled with dried flowers and foliage, tied with ribbons and attached to the wall (more like dust traps and spider homes to me).   Such gentille activities would have only been possible for middle class women and girls who were not forced by their circumstances to work long hours in underpaid jobs.

DSCN4429

A beautifully illustrated poem by Longfellow

Poetry is included in the book.  There are a few by women poets, like American Magaret E Sangster, and this would have been an inspiration to young girls who loved to write poetry and demonstrated that they could also become writers.

The Universal Self-Instructor conveys an idealized view of the period, but for ordinary people who did not possess many books or have the means for further education, it would have been a valuable asset.   It was like having access to the Internet in its day and opened up a world of possibilities in all kinds of fields for many people.

It’s a fascinating book and I hope it inspired some girls, as well as boys, to pursue their dreams in the arts despite the social restrictions.   With all our modern freedoms, resources and technology there is nothing to prevent us from living an artistic life.

Kat

Bags of Creativity

DSCN4035

In this world of mass production I love handmade things.  They tell the story of their creation and continue the skills and traditions valued by the people who made them.  I have a collection of handmade bags and purses from the past and the present.  They are examples of textile crafts that require time and effort to produce and reveal the various ways different cultures embellish utilitarian objects.

Some of my little bags came from ancestors and old family friends.  They were produced in the early part of the 20th century when ordinary women had more time to make their own clothes and accessories and they learnt various crafts that are now usually practiced by artisans and keen hobbyists.  Other more recent bags and purses in my collection are examples of the textile crafts of other countries that are still being created in villages and towns today.

The black beaded evening bag and two rectangular purses were made in the 1920s and 30s by an old family friend.  She must have spent hours sewing or weaving the tiny beads into art deco style designs that were fixed to the fabric backing.  Women’s eveningwear would have been an added expense in those days, especially around the time of the Great Depression and many women made their own party clothes and accessories.  They probably got ideas from overseas fashion magazines.  When I look at these I can hear the sound of jazz bands and the clinking of martini glasses and see couples dancing in their finery.  Such objects remind us that the owners were once young and enjoyed going out to parties and other celebrations.

DSCN4061

Japanese Crochet Beaded Purse, 1960s

I also have a small vintage 60s beaded crotchet purse from Japan.  This type of Japanese beadwork was popular in the 50s and 60s for bags and purses.  You can find lots of examples for sale on the web. It seems to have been a common Japanese style of beading and purse shape. These tiny purses were widely produced and are still being made today. I like its miniature size and design. It must take a lot of patience to do such fine, fiddly work and to fit on the small beads while working with a crotchet hook.

Beaded bags are still admired in the 21st century and new ones are readily available.   I have a grey beaded evening bag made in china and a small red beaded purse from India, where handicrafts are still common and are created for a wider market.  There are also many obsessed independent crafts people who create their own beaded purses for sale online.  It is good that this time-consuming craft has not disappeared.  There is something magical about the way light catches on the surface of the beads.  It is like miniature mosaic.

Another popular craft of the past and present is needlepoint.  I have had a go at this with cushion and picture kits and it is a slow and relaxing pastime.  Before these kits became commonplace women would use unmarked canvas to create their own designs or could purchase graph style patterns to copy.  Of the two bags that I possess one is a combination of petit point and standard needlepoint and the other consists entirely of petit point.  An ancestor created the former in the 1930s and the latter is an example of Austrian petit point, possibly from the 1950s.  One can only imagine the eyestrain caused in stitching such fine needlework, especially before the availability of magnifiers with lights.  Austrian bags like this are still made today but are extremely expensive because they are so detailed and slow to produce.  Anyone who does this painstaking work deserves to be paid well. Luckily there are still plenty of vintage bags available for a reasonable price for those of us with limited means.  I sometimes wonder where the owners took these bags; from the theatre in the 30s to concerts in Vienna in the 50s, it seems a world away from our modern life today.

DSCN4045

Hand Embroidered Silk Evening Bag, 1950s

Other types of embroidery were applied by hand to mid-century bags.  The stylish 1950s black silk clutch in my collection has very fine couching embroidery on the top flap. Nowadays a soulless machine would be employed do this type of detailed embroidery.  This purse reminds me of Audrey Hepburn’s elegant style in a Breakfast At Tiffany’s.

DSCN4051

Embroidered and Crocheted Guatemalan Bags

Buying craft items made in another culture helps to keep the local textile traditions alive.  I have three bags from Guatemala that demonstrate examples of different textile crafts. From woven fabric and rich embroidery to crotchet, these decorative bags represent the work of individual Guatemalan women.  An ordinary bag is turned into a joyous expression of their creativity.  I love their use of color and texture and when I carry these bags, they make me feel happy.

DSCN4060

Iroqui Uzbek Cross Stitch, Uzbekistan

A small handmade cosmetic purse that I use all the time comes from Uzbekistan in central Asia.  It is an example of Iroqui cross stitch, a traditional craft of the Uzbek tribe which uses silk thread.  Equally colorful yet so different from the Guatemalan textiles, this purse belongs to the stylized aesthetic you associate with the central Asian communities along the legendary Silk Road.

At a time when computer technology is giving humans less to do manually in the workplace, it is good that there are still some things where a machine does not produce the best result.  Automated textiles just don’t have the same character as those created by hand.  It is the imperfections that make them unique and visually pleasing.  No wonder so many people are rediscovering old crafts for their own pleasure or to sell on-line.

My small collection of handmade bags and purses display craft traditions from several continents that span nearly a century.  It is wonderful to see the varied methods that have been employed in their creation and decoration. I really admire the patience and ability of the makers of these objects. They have transformed what is just a receptacle for carrying around ones possessions into expressions of their creativity and concepts of beauty.

Kat